Are you ready to dive into the world of stick welding but unsure whether to push or pull while welding?
You’re not alone in this dilemma. Even experienced welders often debate the best technique.
And the truth is, there’s no one right answer. It all depends on factors like metal type, thickness, and personal preference.
But fear not, dear reader. In this blog post, we’ll dissect the pros and cons of both techniques so you can confidently choose the best approach for your next welding project.
So put on your helmet and let’s settle the age-old question: do you push or pull when stick welding?

WHAT’S THE DIFFERENCE BETWEEN PUSH AND PULL IN WELDING
Contents
- 1 WHAT’S THE DIFFERENCE BETWEEN PUSH AND PULL IN WELDING
- 2 YOU SHOULD PULL THE PUDDLE WHILE STICK WELDING
- 3 THE EXCEPTION – WHEN TO PUSH YOUR PUDDLE
- 4 When to Push while Stick Welding
- 5 THE REALITY OF PUSHING VS PULLING
- 6 THE PROPER WAY TO STICK WELD
- 7 STICK WELDING TRAVEL ANGLE
- 8 HOW TO STRIKE AN ARC
- 9 WHAT ROD SHOULD YOU USE AS A BEGINNER
- 10 CAN YOU WELD SHEET METAL WITH A STICK WELDER?
- 11 FREQUENTLY ASKED QUESTION
Today, we embark on a journey to unravel the enigmatic debate surrounding the push and pull techniques in welding. As a seasoned welder, you are well aware of the impact these techniques can have on the quality of your welds. So, let us master the intricacies of welding by delving into the perplexing question of when to push or pull.
First and foremost, let us establish the fundamentals. When engaging in stick welding, it is imperative to always push the electrode. This aids in maintaining control over the arc and ensuring a seamless puddle. However, if you come across pesky slag during your welding process, it is crucial to switch to the pull technique. Pushing in such a scenario would only result in trapping the slag into your puddle, leading to subpar and lackluster welds.
But why is controlling slag of utmost importance? Well, for starters, it can compromise the strength and aesthetic appeal of your welds. This is why making the right decision between pushing or pulling is vital, depending on your specific welding process and materials.
Now, let us weigh the pros and cons of each technique:
Push Technique:
- Advantages: Superior control over arc and puddle, easier for beginners to grasp
- Disadvantages: Can trap slag if present in the weld, demands more skill for uphill welding
Pull Technique:
- Advantages: Assists in controlling slag, well-suited for tackling uphill welding
- Disadvantages: Demands greater skill to handle arc and puddle
As evident, both techniques possess their own merits and demerits. So how do you determine which one to employ? It all boils down to understanding your welding process and materials.
When employing flux or stick welding on mild steel, it is recommended to always pull the rod. This ensures that no slag is trapped and results in robust welds.
YOU SHOULD PULL THE PUDDLE WHILE STICK WELDING
When it comes to stick welding, there are two primary methods for manipulating the molten metal: pushing and pulling the puddle. While both techniques have their own advantages and drawbacks, one stands out as the preferred method for achieving precise and high-quality welds – pulling the puddle.
Pulling the puddle involves dragging the electrode along the joint in the direction of the weld, while pushing involves pushing the electrode away from you. Although pushing may appear to be the more instinctive motion, pulling has proven to be more advantageous for several reasons.
Firstly, pulling the puddle results in a smoother and more uniform weld. By dragging the electrode along the joint, you have greater control over the size and shape of the weld pool, resulting in a consistent and visually appealing finish. This is especially crucial when working with thinner materials where even minor changes in heat can cause warping or burn-through.
Additionally, pulling provides better control and precision. As you drag the electrode along, you can make adjustments to your speed and angle, ensuring a steady and consistent weld. This is essential for creating strong and dependable welds, particularly in critical applications like structural steel.
Another key advantage of pulling instead of pushing is its ability to prevent electrode sticking. When pushing, there is a higher risk of the electrode sticking to the workpiece due to gravity. This can cause interruptions in the welding process and lead to an uneven and flawed weld. By pulling, you can avoid this issue and maintain a smooth welding process.
Furthermore, pulling the puddle promotes proper heat distribution. As you drag the electrode along, heat is evenly distributed across the joint, preventing any weak spots or flaws in your weld. This is especially important when working with thicker materials where heat distribution is crucial for strong and long-lasting welds.
Lastly, pulling instead of pushing can also improve visibility.
THE EXCEPTION – WHEN TO PUSH YOUR PUDDLE
As a skilled welder, you are well aware of the importance of electrode manipulation in producing high-quality welds. In stick welding, the standard practice is to always pull the electrode. This allows for better control of the arc and results in a smooth and consistent weld pool. However, there is one exception to this rule – when welding in the vertical position.
In vertical welding, pushing the electrode upwards can actually lead to deeper penetration and fewer defects. This may seem counterintuitive, but let’s explore the science behind it.
When pushing the electrode upwards, the arc is directed towards the upper portion of the weld pool. This concentrates the heat in that area, resulting in stronger welds with greater depth. Additionally, pushing upward also helps to prevent common defects like slag inclusions and porosity, which can weaken a weld.
But why does pushing work better in vertical welding than pulling? The answer lies in gravity. In vertical welding, gravity pulls the molten metal downwards, making it easier for impurities like slag to rise to the surface of the weld pool. By pushing upwards, these impurities are forced out of the pool, resulting in a cleaner and stronger weld.
So when is it appropriate to push your puddle? If you are welding vertically or on an inclined surface, pushing upwards will yield better results. However, it’s important to remember that this technique should only be used if there is no risk of slag falling back into the weld pool. If there is any presence of slag, it’s best to stick with the traditional method of pulling.
In summary, while the general rule of “pulling your puddle” still applies in most stick welding situations, it’s important to keep in mind that pushing upwards can be beneficial when working vertically. And as always, follow the rule “If there is slag, you must drag” for optimal results.
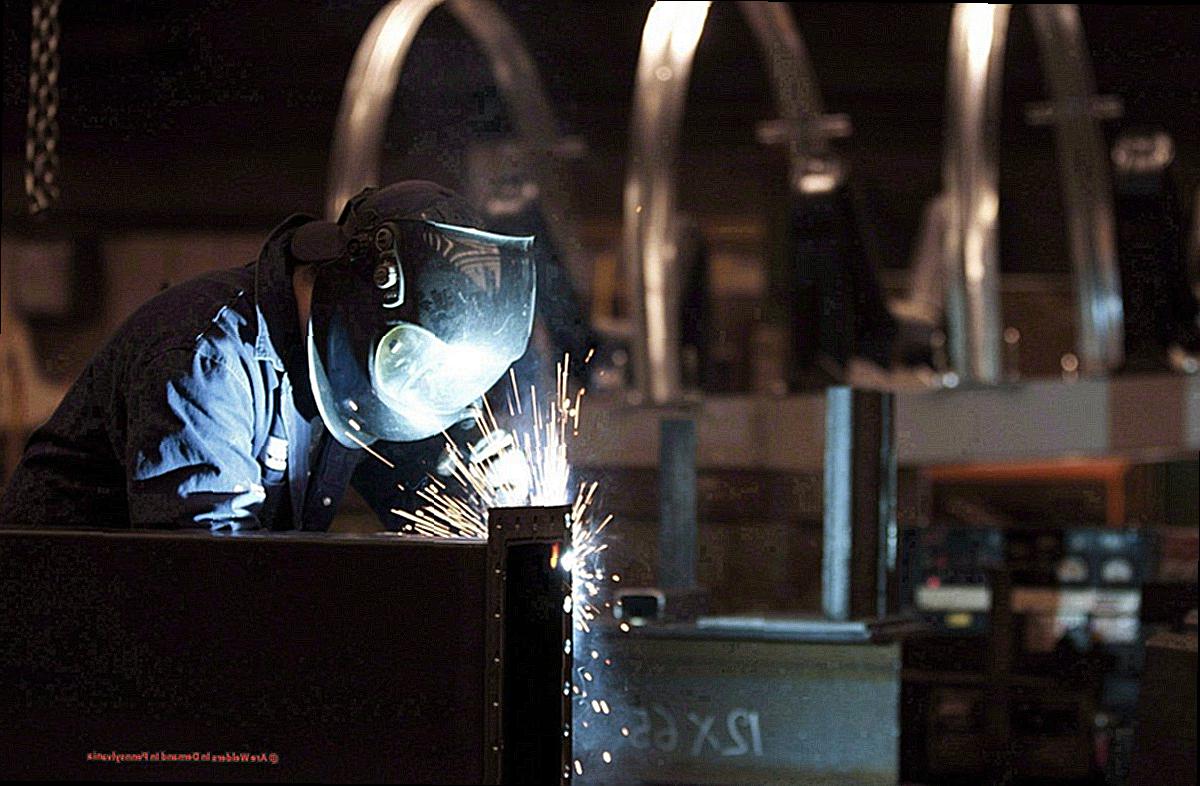
When to Push while Stick Welding
Stick welding, or shielded metal arc welding (SMAW), is a versatile and widely used technique in the welding world. As an expert in this field, it is crucial to understand the art of pushing and pulling while welding to achieve the best results. The debate over which method is superior has long been a hot topic among welders, with strong opinions on both sides. However, for beginners, it is essential to first master the fundamentals before choosing a preferred method.
So, you may ask, when should one push or pull while stick welding?
Pushing and pulling refers to the direction in which the electrode is moved during the welding process. When pushing, the electrode is pushed away from the weld pool, while pulling involves bringing it closer towards the weld pool. Studies have shown that when using flux or stick welding, pushing should be avoided. This is because pushing can trap slag into the weld pool, resulting in subpar welds. The trapped slag can cause defects such as porosity, compromising the strength and quality of your weld.
On the other hand, pulling is recommended for flux or stick welding as it allows impurities and slag to be pushed away from the weld pool, resulting in cleaner and stronger welds. This technique also provides better control and visibility of the welding puddle, enabling more precise adjustments.
For regular MIG and TIG welding, both pushing and pulling are acceptable methods. Some prefer pushing for better visibility, while others opt for pulling to maintain control. When working with curved edges or irregular surfaces, pulling may be more suitable as it allows for better visibility of the quality of the bead while welding.
But here’s where things get interesting – there is an exception to this rule. In vertical positions with stick welding, pushing can actually be beneficial. Let gravity be your ally and push away impurities for optimal results.
THE REALITY OF PUSHING VS PULLING
In reality, both techniques can be effective in their own ways. The effectiveness depends on various factors such as polarity, weld position, electrode size, arc length, and dexterity. Let’s delve deeper into the reality of pushing vs pulling in stick welding.
Polarity plays a crucial role in determining the most suitable technique. In stick welding, the electrode can be connected to either the positive or negative terminal of the welding machine. When connected to the positive terminal (reverse polarity), it creates a hotter and more penetrating arc, making it ideal for pushing. On the other hand, when connected to the negative terminal (straight polarity), it produces a smoother and less penetrating arc, making it more suitable for pulling.
The weld position also affects which technique to use. In flat and horizontal positions, pushing can trap slag and impurities inside the weld pool, resulting in weaker and less durable welds. In these positions, pulling allows for better control and visibility of the welding puddle. However, in vertical positions where gravity can aid in pushing away impurities, pushing may actually be beneficial.

The type of electrode chosen also plays a significant role in determining the most effective technique. Cellulosic electrodes are best suited for pulling as they produce a deep penetrating arc with a significant amount of slag that needs to be pulled away from the weld pool. On the other hand, low hydrogen electrodes are better for pushing as they create a smoother and less penetrating arc with minimal slag.
Regardless of the chosen technique, there are essential factors that must be maintained.
THE PROPER WAY TO STICK WELD
Stick welding, or shielded metal arc welding, is a versatile and widely used technique in the welding industry. As an accomplished stick welder, you understand that achieving high-quality welds requires precision and attention to detail. In this section, we will delve into the intricate tips for stick welding that will help you create welds that are not only strong but also durable.
Cleanliness is the Key to Success
Attention to detail starts with cleanliness when it comes to stick welding. Before starting the process, it is imperative to ensure that the joint is free of any impurities such as dirt, rust, or contaminants. Thoroughly cleaning the joint using a wire brush or grinder is crucial for better penetration and reducing the risk of porosity in the weld.
Scratch or Tap: The Arc Initiation Techniques
The most common methods for starting the arc in stick welding are the scratching method and tapping technique. By gently scratching or tapping the electrode against the metal, a spark is created, and quickly lifting it establishes the arc. This approach prevents contamination of the electrode and guarantees a stable arc for a flawless weld.
Adjust Your Current Settings for Optimal Results
To achieve smooth and robust welds, it is essential to set your current at the right level. Too low of a current can result in inadequate penetration, while too high can cause excessive spatter and distortion. Adjust your current based on the thickness of the metal and electrode size for optimal results.
Choose Materials with Low Sulfur and Silicon Content
When selecting steel for stick welding, pay attention to the sulfur and silicon content. High levels of these elements can lead to cracks in the weld, compromising its strength and quality. Be mindful of choosing materials with lower levels of these elements for a flawless weld.
STICK WELDING TRAVEL ANGLE
One crucial element of stick welding that can significantly impact the quality of your welds is the travel angle.
Travel angle refers to the angle at which the electrode is held in relation to the direction of travel. It plays a pivotal role in controlling the depth of penetration, bead shape, and overall appearance of your welds. Let’s delve deeper into the intricacies of stick welding travel angle and discover how to wield it proficiently for various welding scenarios.
The Work Angle for Stick Welding:
The optimal work angle for stick welding is a perpendicular 0° to 0° lead angle in the dragging direction. This entails holding the electrode perpendicular to the joint and slightly tilting it towards the direction of travel. This technique provides better stability and control during the welding process.
Vertical Up Welding:
For vertical up welding, where you are working against gravity, employing a push or forehand technique is recommended. In this method, it is advised to tilt the top of the rod at an approximate angle of 5-15 degrees away from the direction of travel. This helps maintain a consistent arc length and prevents excessive penetration.
Speedy Travel on Thin Sheets:
When working with thin sheets of 0 to 8 gauge steel, utilizing a downhill angle allows for faster travel speeds. This entails positioning the work at a slight downhill angle of 0-7 degrees. However, it is crucial to maintain control and avoid excessive penetration while using this approach.
HOW TO STRIKE AN ARC
Selecting the correct electrode and amperage for your welder is the first step in striking an arc. The type of electrode chosen depends on the material being welded and its thickness, making it a perplexing decision.
A general rule of thumb is to use a smaller electrode for thinner materials and a larger one for thicker materials. Seeking advice from experienced welders or consulting your welder’s manual can help determine the appropriate electrode and amperage for your specific welding project.
Once you have selected the electrode and amperage, it’s time to position it close to the surface being welded. This step may seem simple, but it requires precision and quick thinking to ensure the electric arc forms easily. Remember, as you strike an arc, the electrode will melt, making it essential to maintain a consistent distance throughout the process.
Now comes the bursty part – swiping the electrode to initiate the electric arc, much like striking a match. This quick movement creates friction that generates heat and ignites the flux coating on the electrode, resulting in sparks flying – a burst of energy that signifies a successful strike.
As you continue welding, maintain a short arc length by keeping the distance between the electrode and base metal relatively short.
WHAT ROD SHOULD YOU USE AS A BEGINNER
When it comes to stick welding, choosing the right electrode is crucial for achieving a clean and sturdy weld. As a novice, it is vital to begin with an electrode that is forgiving and user-friendly. That’s why I highly recommend starting with a rutile rod, such as E60 or E70.
But why are rutile rods ideal for beginners? Well, these electrodes contain a high percentage of rutile, a mineral that aids in stabilizing the arc and making it easier to strike. This means that even if you make a mistake, the electrode will still produce a satisfactory weld.
Now, let’s delve into more specific options for novice welders. For all-purpose use, I suggest an electrode like E600 or E60. These electrodes possess a balanced blend of rutile and cellulose, making them versatile and suitable for a diverse range of welding projects.
If you are working with thin mild steel, then the high-speed and versatile E60 is your go-to choice. This electrode can be used in all positions and is perfect for low-amperage welding on sheet metal. Its quick-cooling slag also makes it optimal for vertical and overhead welding.
But wait, what do “E60” or “E70” even mean? Allow me to elucidate. The letter “E” stands for “electrode,” while the subsequent numbers represent different characteristics of the electrode. In this case, “60” indicates the tensile strength in thousands of pounds per square inch (psi). Therefore, an E60 electrode has a tensile strength of 60,000 psi.
CAN YOU WELD SHEET METAL WITH A STICK WELDER?
The answer is yes, but it’s not without its difficulties. Stick welding is known for its aggressive nature, making it a challenging technique to master when working with thin sheet metals. However, with the right approach and equipment, you can successfully weld sheet metal using a stick welding machine.
The first step to successfully stick welding thin sheet metal is selecting the right electrode. For beginners, it’s best to start with rutile rods like E60 or E70. These electrodes contain a mineral that stabilizes the arc, making it easier to weld even if you make mistakes.
For all-purpose use, versatile and balanced options like E600 or E60 electrodes are ideal. They work well on various types of metals and are suitable for any welding position. On the other hand, when working with thin mild steel, high-speed E60 electrodes are recommended. These rods have quick-cooling slag and can be used in all positions, making them perfect for thin sheet metal.
But what do these numbers and letters mean? Don’t fret; we’ve got you covered. The “E” in the electrode’s name stands for “electrode,” while the numbers indicate the tensile strength in thousands of pounds per square inch (psi).
Now that you’ve chosen the right electrode, it’s time to adjust your amperage. For welding thin sheet metal, it’s crucial to work on low amperage to prevent burning through the metal. The 708 and 60 rods are preferred for this type of welding.
In addition, paying attention to your technique when stick welding sheet metal is essential. Keep your movements steady and consistent to avoid creating holes or warping the metal.
In conclusion, while it may be a daunting task, it is possible to weld sheet metal using a stick welding machine.
FREQUENTLY ASKED QUESTION
The recommended technique for stick welding is to push the electrode, rather than pulling it. While this may seem counterintuitive at first, pushing actually offers better control over the arc compared to pulling.
When you push the electrode, the arc is directed towards the weld puddle, making it easier to manage. On the other hand, if you were to pull the electrode, the arc would be directed away from the puddle, making it more challenging to control. This is especially important when using electrodes with slag, as pulling can cause slag to become trapped in the weld puddle, resulting in weak and brittle welds.
Moreover, pushing the electrode allows for better visibility of the weld pool. When pulling an electrode, it can obstruct your view of the weld puddle, making it harder to spot any imperfections or inconsistencies in the weld.
Additionally, pushing the electrode creates a smoother and flatter bead compared to pulling. This not only leads to a more aesthetically pleasing weld but also results in a stronger and more durable joint.
But why is this technique so vital? Well, using the right method can make all the difference in achieving a successful weld. It not only ensures better control but also leads to stronger and more durable welds. Furthermore, by pushing rather than pulling, you can save time and effort by avoiding any potential issues caused by slag getting trapped in the weld puddle.