Welding vertically is a great way to join two pieces of metal together. It’s used in many industries, from car repair to construction. Learning how to weld vertically can seem intimidating at first, but with the right knowledge and practice, it’ll become an essential skill for any welder.
This blog post will take you through the basics of welding vertically. We’ll start by discussing the different welding processes and equipment needed for this task. Then we’ll move on to preparing the metal, setting up your work area, and making sure you have a good weld joint. Finally, I’ll provide tips on troubleshooting any issues you may encounter while welding vertically.
Whether you’re new to welding or an experienced pro looking for some helpful advice, this blog post has something for everyone. With clear instructions and helpful tips, you’ll be an expert in no time! Let’s get started!
What is Vertical Welding?
Contents
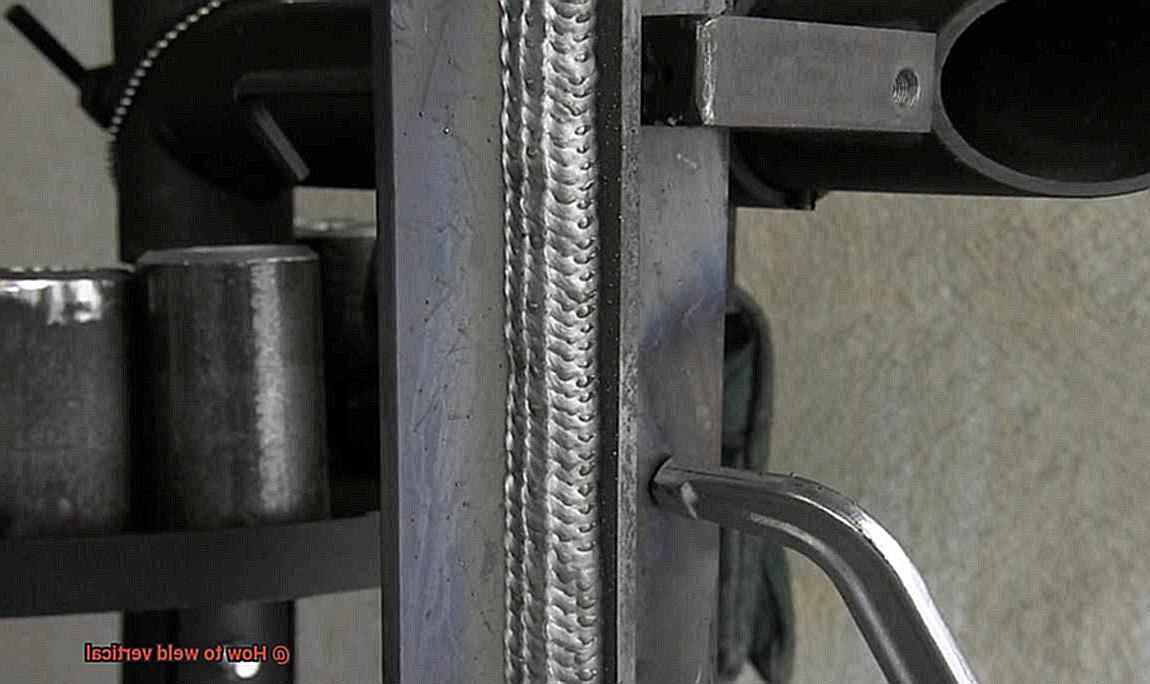
Vertical welding is an innovative process that involves joining two metal components in an upright or vertical position. To ensure a strong and secure bond, the welding process requires special equipment, techniques, and materials.
Tungsten Inert Gas (TIG) welding is the most common form of vertical welding. This method uses a non-consumable tungsten electrode to create an arc between the two pieces of metal.
The use of a welding torch, filler material, and shielding gas are also necessary for a successful weld.
Safety must be taken into consideration when performing vertical welding, as it can be dangerous if not done properly.
Protective gear such as a welder’s mask, gloves, and clothing should always be worn when working with this type of welding.

Additionally, having the right tools and supplies for the job is essential for a successful weld.
Do You Weld Up or Down When Vertical Welding?
Welding vertically requires careful consideration of the direction you’ll be welding in—up or down. Upward welding is the most common choice, as it offers superior control over the weld puddle and is best suited for thicker materials.
Downward welding, on the other hand, is an ideal choice for thinner materials as it creates less distortion due to decreased heat input from the welder.
It’s important to note that both upward and downward welding can be done with any type of welder, but some welders may be better suited for one direction than the other.
Is Vertical Welding Hard?
Vertical welding may be the perfect skill for you! While it’s not the easiest type of welding, it can certainly be mastered with the right knowledge and experience.
To get started, it’s important to understand the basics of welding. Knowing about all the various welding techniques and how each one works will ensure success when vertical welding.
Safety is also a must when performing this type of welding, so make sure you know all the precautions that need to be taken.
In addition to knowledge, welders must have strong hand-eye coordination and be able to concentrate for long periods of time in order to properly weld vertically. With dedication and patience, you’ll soon master this technique.
If you’re looking for an exciting challenge that will teach you a new trade, look no further than vertical welding.
How to Set Up for Vertical Welding
Setting Up for Vertical Welding
If you’re looking to get started with vertical welding, the first step is to make sure that your welder is set up correctly and all safety equipment is in place.
When adjusting the settings on your welder, be sure to select the correct type of metal you are welding.
Additionally, ensure that your ground clamp is secured to a clean surface and that the electrode holder is positioned at an angle of 45 degrees from the surface.
If you’re using a MIG welder, make sure that your shielding gas is set up properly and that you have the right wire for your project.
Finally, don’t forget to put on all necessary safety gear, such as a welding helmet, gloves, and protective clothing, before starting work.
Establishing Connections
Once your welder is set up correctly, it’s time to establish proper connections between the electrode holder and ground clamp. Attach both parts to their respective cables, and then securely attach them to the welder itself.
Before beginning any welding operations, double-check that all connections are tight and secure.
It’s also important to adjust the voltage and amperage settings on your welder according to the size of the electrode being used for best results.
Preparing Your Workpiece
Before starting any vertical welding project, ensure that your workpiece is properly clamped down so it won’t move during operation.
Use a high-quality electrode holder and ground clamp to ensure even heat distribution throughout the weld area and to prevent sparks and splatter during operations.
Choosing The Right Electrode
When selecting an electrode for vertical welding jobs, consider both the type of metal you are working with as well as what type of welder you have available (MIG or TIG).
Before beginning work on any vertical welds, make sure your arc welder is properly set up with an appropriate electrode; similarly, if using an MIG welder, make sure you have a good quality wire feeder and gun set up with appropriately sized wire for your project.
Safety Precautions
As with any other welding occupation, safety should always come first when setting up for vertical welding projects—no exceptions! Make sure all necessary safety equipment, such as a welding helmet, gloves, and protective clothing, is in place before starting work; additionally, double-check that all connections between electrode holders and ground clamps are secure before starting operations so there won’t be any unexpected sparks or splatter during use.
How to TIG Weld Vertically
TIG welding (also known as Gas Tungsten Arc Welding or GTAW) is a special welding process that uses a non-consumable tungsten electrode to heat the metal and create an arc.
This process is extremely precise and versatile, allowing for welds made of many different metals in various sizes.
It is often used in the aerospace and automotive industries due to its superior strength and accuracy.
When it comes to vertical welding, TIG welding provides the most control and accuracy. The welder must be able to maintain a steady hand in order to keep the arc consistent and achieve a quality weld.
Additionally, they must be aware of any potential burn-throughs or warping due to heat buildup in the metal. To reduce this risk, it is important for the welder to adjust their travel speed accordingly as well as use proper shielding gas flow rates and amperage settings.
With practice, TIG welding can provide excellent results for vertical welds.
How to MIG Weld Vertically
MIG welding is a popular welding method for vertical welding due to its speed, efficiency, and cost-effectiveness. To ensure a strong weld, it is important to use the correct technique when MIG welding vertically. This comprehensive guide will help you get started on your next vertical MIG welding project.
Preparation
Before starting the welding process, make sure that your workpiece is securely clamped in place. This will ensure that the joint remains stable while you are welding it.
Welder settings
Adjust your welder settings according to the material you’re working with. The machine’s voltage and wire speed should be set correctly, and the right gas mix should be selected. Additionally, adjust the gun angle to achieve an even weld bead.
Methods
When MIG welding vertically, use either a push or pull technique depending on the type of weld joint being made. Also, keep the gun at a consistent distance from the workpiece and maintain a steady travel speed while welding for the best results.
Filler Material
For complete fusion between two pieces of metal, using enough filler material is essential. Make sure you use enough filler material after the welding is complete to ensure there are no gaps between them.
Obstructions
Check for any obstructions in front of or behind the weld joint that may interfere with the arc or cause splatter during the process of welding. Clear any obstacles before starting work to guarantee a successful weld job.
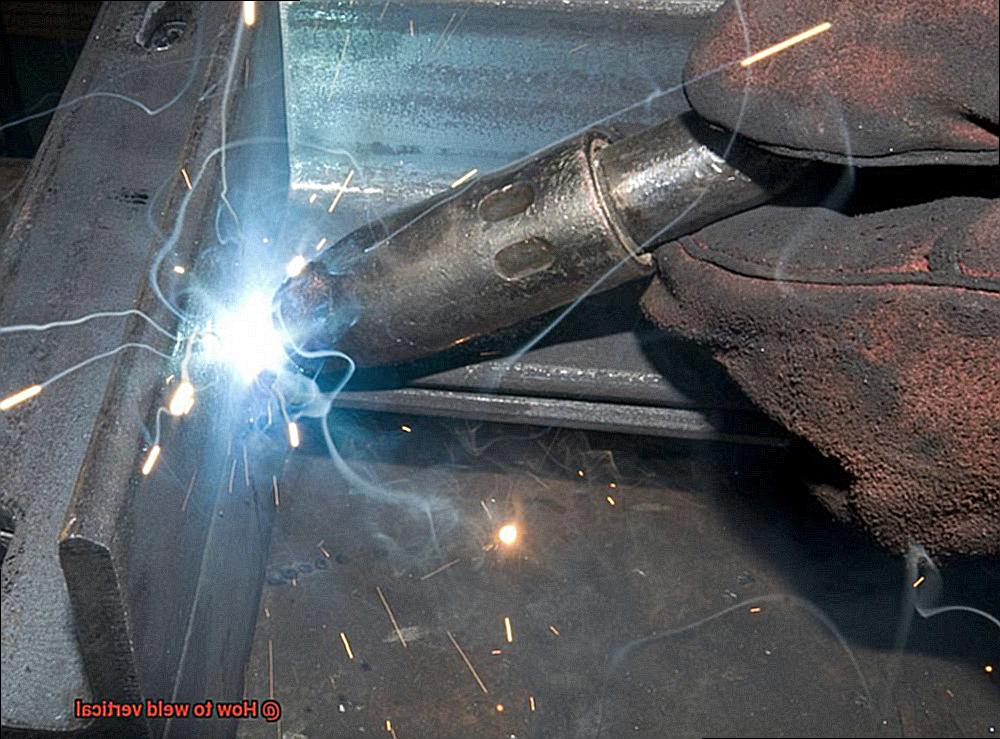
How to Vertically Stick Weld
Adjusting Amperage for Stick Welding Vertically
When stick welding vertically, it is essential to adjust the amperage in order to ensure that the weld will penetrate properly and not burn through the material. This is because the heat is more concentrated when welding vertically, requiring more current to be used in order to create a solid weld. It is important to find a setting that suits your particular situation, as too much current can result in excessive spatter and damage the workpiece.
Choosing an Appropriate Electrode
When stick welding vertically, it is important to use a longer electrode for better penetration and control of the arc length. Additionally, make sure that the electrode angle is at least 15 degrees from the surface of the material.
Using an electrode with a flat or slightly convex tip will help create a wider bead and make it easier to regulate the heat input. This will help ensure that you get good penetration and a good weld on vertical surfaces.
Maintaining Electrode Perpetual
Keeping the electrode perpendicular to the workpiece when stick welding vertically is key to ensuring good penetration and creating a strong weld.
If you are having trouble keeping your electrode perpendicular during welding, try using clamps or magnets to hold it in place while working. This will help maintain the health and consistency of your beads throughout your welds.
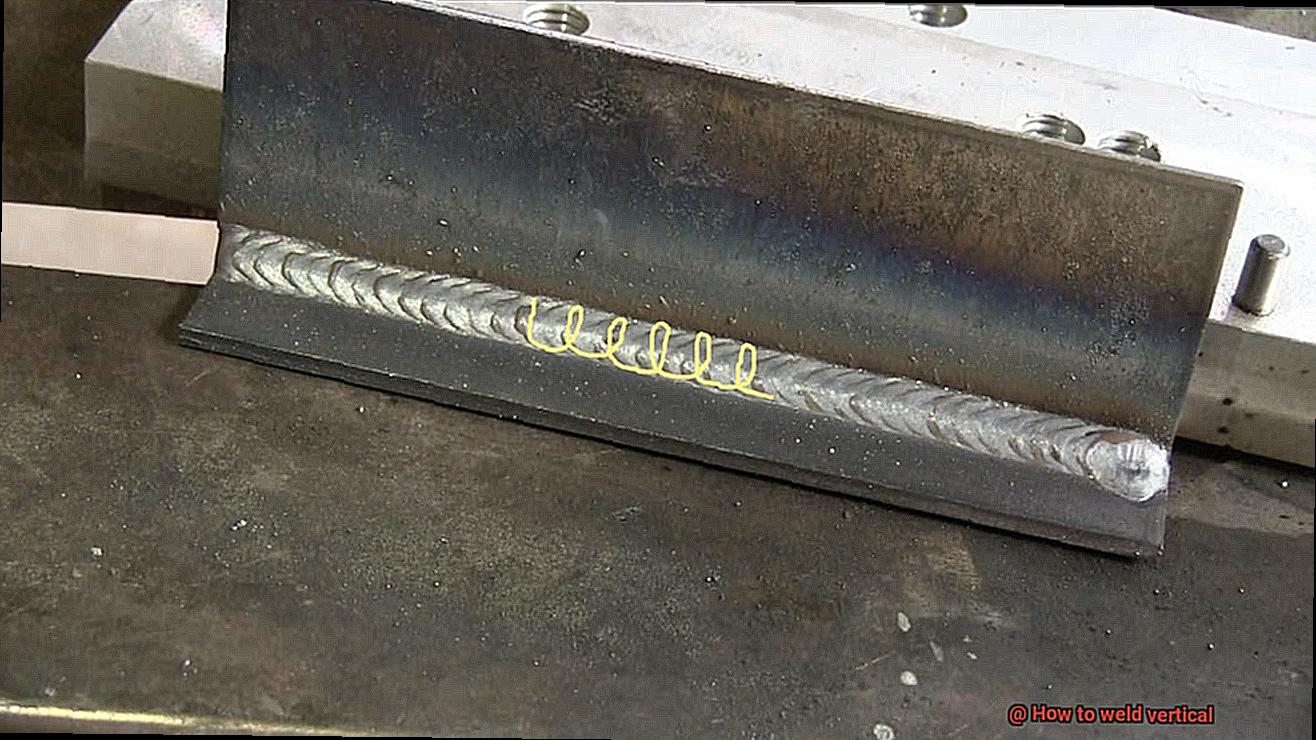
Making Short Passes
When stick welding vertically, it is best practice to make short passes in order to minimize heat buildup and ensure that the weld does not become too hot or distorted.
In addition, weaving a little while stick welding vertically can help create an even weld bead with good penetration into both directions of the material being worked on.
This will also help prevent warping of thin materials as a result of excess heat transfer from long passes or high current settings.
Patience
Stick welding vertically can be daunting for beginner welders, but with patience and practice, anyone can learn how to do it correctly and safely.
Taking your time while learning this skill will help you gain confidence in your abilities as well as increase your overall safety when working with high temperatures and electricity around metal objects.
Tips and Tricks for Efficient Vertical Welding
Vertical welding is a complex and precise craft, requiring the right technique and equipment to ensure successful welds. To help you become a more efficient vertical weaver, here are nine tips and tricks to get you on the right track.
The Right Method and Equipment
Before you start welding, make sure you have all of the necessary tools, supplies, safety gear, and a welding machine with adjustable current settings. This will help ensure consistent welds and reduce mistakes.
Practice Makes Perfect
Take some time to practice your technique on scrap metal before attempting any projects. This will help you get to know your machine better and develop healthy habits that will result in more successful welds in the long run.
Clamps or Magnets
To maintain the accuracy and stability of your welds, consider using clamps or magnets to hold your pieces in place while welding. This will help reduce fatigue and improve accuracy over time.
Electrode Size Matters
When welding vertically up, use a smaller electrode; when welding vertically down, use a larger electrode instead. When done correctly, move the electrode in a circular motion around the joint area to create an even bead.
Adjusting Current Settings
When welding vertically up, adjust the current settings accordingly to prevent burnthrough; when welding vertically down, use a higher travel speed to prevent porosity from forming in the welds.
Short Bursts of Current
To avoid overworking the metal or creating too much heat in one area that may lead to warping or distortion in the metal being welded together, use short bursts of current rather than a long burst when welding vertical joints.
Keeping it Clean
Keeping your work area clean and free of debris helps reduce distractions and allows you to concentrate on quality welds without interruption or mishaps caused by dirt or dust particles entering your workspace during operations.
Filler Rod That Matches Base Metal
When TIG welding, make sure to use a filler rod that matches the base metal being welded and that it is clean before using for better results and fewer mistakes.
Safety First
Don’t forget about safety! Always wear protective gear such as gloves, goggles, protective clothing, etc., when performing any kind of welding job. This not only shields you from potential harm but also helps ensure high quality for each project’s outcome.
Conclusion
Vertical welding is a demanding yet rewarding skill to master. With the right knowledge, equipment, and practice, anyone can become an expert welder. This blog post has provided an overview of vertical welding basics, from various welding techniques and equipment to tips on troubleshooting issues you may encounter while welding.
We’ve explored how to set up vertical welding, TIG weld vertically, MIG weld vertically, and stick weld vertically, as well as tips and tricks for successful vertical welding. With these insights in mind and plenty of repetition, you’re sure to be ready for any vertical welding challenge that comes your way.
It’s essential to remember when it comes to welding: always make sure you have the right protective equipment before starting any job.